Saturday, 17 January 2015

Deathstroke - Arkham origins - build

So durring the comic expo in Belgrade, i managed to make my deathstroke cosplay in about 5 days. Took a few days off work to finish it , but im pretty satisfied with the results. I won 2nd place in the costume contest, though a lot of it didnt fit properly, like the helmet which was too big for my head -.- so ill possibly redo this in the future, also in queue is his sword and staff.

my loyal companion gets threatened with the steel of my katana


my boot-feet plates fell off durring my walk -.-
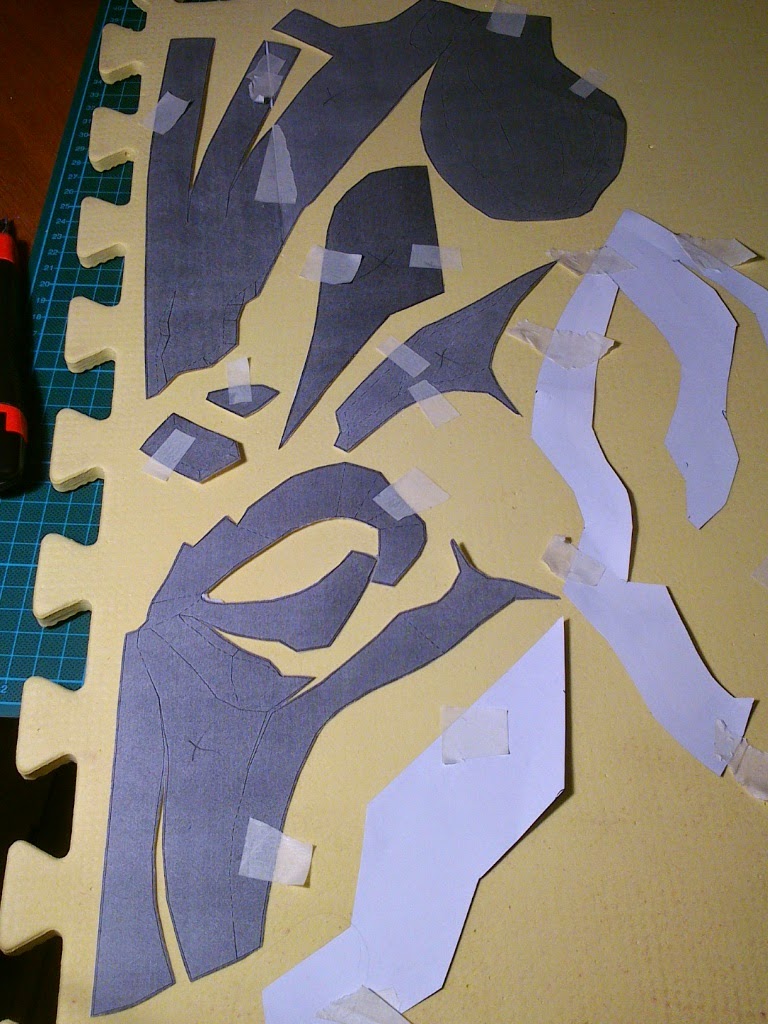
 This is the process of my helmet build, all is eva foam, heated to fit the printed patterns..This will be redone in the future since the helmet is quite big on my head ._.


The helmet and the colored parts of the armor were coated in plastidip, while others which were originally black were coated in PVC glue, since its cheaper and im in lack of funds to buy massive ammounts of plastidip xD; The white parts of the costume however are sintra or forex (plastic)


Thursday, 2 January 2014

Destroyer soldier - Helmet Build - day 1

N7 destroyer soldier 

New year's start, ive been meaning to start building another cosplay armor from mass effect, and i've always had my eye on the Destroyer N7 soldier, since he's among my top fave mp character. Though its basicly a recolor of the Terminus armor with few more details, so the files ill be using are from the Terminus armor itself...


Pepakura files for it can be located on this thread  , among other useful pepakura files for the people who are going to try their hand out at mass effect cosplay..

First up is the helmet, im using 3mm and 1cm clear black eva foam which i bought online, dremmel, hot glue, scalpels, the usual.

cutting the parts from eva foam is the easiest and most boring part of the job ;c

the top dome and back of the helmet asembled, along with all the parts needed to construct the helmet

the dome had some warping but nothing hot glue cant handle

back of the helmet and the sides of it conected

the cutouts on the front where the mask was supposed to fit in

cutting out space for the front 'decoration'

everything glued into place


added few minor details with 3mm foam
side view

posing

moar posing


it still lacks more details like screws and borders i plan on doing, and of course the plastic visor and paint. Even though it is black, i love giving my armor the 'live' look it gets when painted on..


Saturday, 7 September 2013

Dead Space 2 Advanced Helmet Build finish

After letting the paint dry i finally got to my favorite part of making props. Painting..

I used acrylic paint to achieve the effects in the photographs, after that i sealed them with a clear coat of paintsealer. LED lights are in plan, after i figure out how to work them that is. This helmet is now in the hands of my friend and she was psyched to get it for her birthday ;D So it was a smashing success


+ some bonus schenanigans when i gave her the helmet


the success of her helmet also made me want to redo my own n7 one so ill be doing that in the future and redoing parts of my n7 armor... Also adding lights to it.


Dead Space 2 Advanced Helmet build progress

 So my ironman costume was put on hold due to exam, lack of motivation and the contest deadline for application being sooner than i thought so i scrapped it. For now.

My friend's birthday was coming up so i decided to do something special for her, and since she is a big dead space fan and we plan on making Isaac and Carver and fooling around in our costume, what the gift would be was pretty obvious.

The entire build took me around a week or so to build, mostly because i didnt have proper patterns for the helmet so i had to wing half of it, most of the parts didnt fit together perfectly and i had to do a lot of resizing and such.

I used forex (pvc plastic) for the white parts, eva foam for the blue parts.

i used the official sculpture for reference on some details and the paint scheme


onto the build.
the start is always the easiest ;d


the sides warped too much so i aded white pieces of pvc to hold them up which i glued in later to make the sides more straight


the black pieces of plastic are actually case holders for PC processors, i have a lot of them laying around so i decided to use some since they have quite a nice bit of texture and shape. the screw shapes were actually beads from a bracelet i had lying around which also looked like somekind of spacey-screws.

TIP: collect random stuff, i have a whole case of useless accessories like this which may come in handy while building props. If something has an interesting shape? Keep it.


Finally done with the building, now for the sealing
i used about half water half wood glue to seal the foam, also was careful not to paint over the white bits. Whiped them off with napkins after finishing with the sealing.

after the glue cured i proceeded with spraying over the primer color black


After this on to my fave thing - Painting.